

Let’s build something together.
Create a Unity project
To begin, let’s create a 3D Unity project:
- On Unity Hub, select Projects from the left menu.
- Select the New button on the top-right corner.
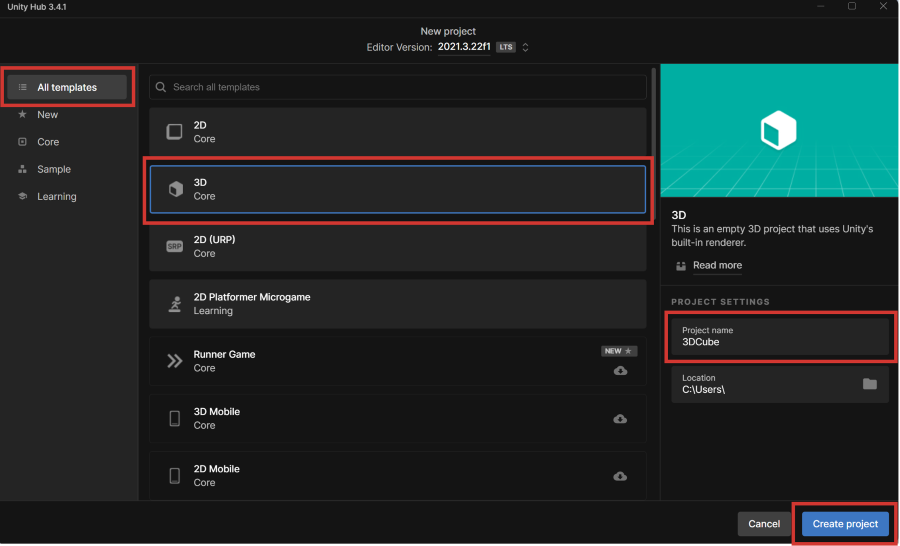
 The Create a new project with Unity dialog appears.
 - Select the 3D template and name the project 3DCube. If you’d like to change where the project will be saved, change the Location settings. Then, select the Create button.
 A new project is created, and Unity opens when the project finishes loading.
Set the default code editor in Unity
Once Unity loads your project, things should work as intended, but let’s check to see if Unity is using the correct installation of Visual Studio.
- On the menu bar, select Edit > Preferences.
 The Preferences dialog appears.
 - Select the External Tools tab. From the External Script editor drop-down list, choose Visual Studio 2019.

